

Can you paint prefinished plywood?
Some prefinished plywood can be repainted, but adhesion to the existing surface must be checked first. The new coating is bonding to a factory finish, not directly to raw wood. Identify that finish, confirm a suitable coating system, and test it before painting an entire cabinet.
Buying new sheets for an opaque painted finish? Start with unfinished plywood instead of paying for a factory surface you intend to cover. Refinishing makes more sense when sound panels are already installed or replacing them would create unnecessary work.
Start with the finish, not the plywood species
Berta’s prefinished plywood specifications distinguish UV-clear-coated birch from white melamine. They share a product page, but they are not the same paint substrate. A result on one surface does not establish compatibility with the other. [1]
| Surface | What the new coating contacts | What to confirm |
|---|---|---|
| UV-clear-coated birch | An existing cured clear finish. | Compatibility with that factory coating. “UV-cured” alone does not identify its complete chemistry. |
| White melamine | A decorative melamine surface. | A preparation and primer system suitable for that laminate, with a separate trial. |
| Cut edge or unfinished back | Exposed wood rather than the finished face. | Raw-wood preparation and sealing. A face adhesion test does not test the edge. |
| Previously refinished cabinet | Whatever paint, polish, filler or coating is now present. | Its condition and history. A new offcut cannot reproduce years of kitchen use. |
Berta lists both faces finished on the 3/4- and 1/2-inch options and one face finished on the 1/4-inch options. Check the side in front of you rather than assuming that every surface of a prefinished panel has the same treatment.
When repainting is worth testing—and when to stop
A sound, well-attached finish is a candidate for a refinishing trial. A peeling factory coat, loose laminate or swollen panel is a repair problem first. A bonding primer does not reattach a failing layer underneath it. General Finishes specifically advises against coating over an existing failing finish. [2]
Stop if cleaning softens the surface, the laminate lifts, or the panel is damaged. For a new build, consider leaving factory-finished interiors alone and using raw material for parts that need paint. The paint-grade cabinet plywood guide covers that material-selection decision separately.
Which primer works on prefinished plywood?
Choose by the existing finish and intended topcoat, not simply by the word “wood” on the primer can. Ask the coating supplier to confirm the complete system, including cleaning, abrasion, film thickness, recoating and test timing.
| Example | What the manufacturer publishes | What remains unverified here |
|---|---|---|
| INSL-X Stix SXA-110 | A bonding primer for difficult glossy surfaces. Its technical sheet calls for testing questionable substrates for adhesion and topcoat compatibility. | Performance on the exact Berta factory finish and with your selected cabinet topcoat. [3] |
| Zinsser Bulls Eye 1-2-3 Water-Base | The published substrate list includes glossy enamels, varnishes and laminates. | That broad suitability is not a completed test on Berta UV-coated birch or white melamine. [4] |
Neither example is a guaranteed solution for every factory finish. Do not combine a cleaner, primer and topcoat solely because each says it works on cabinets. Confirm their compatibility as a sequence.
Prep before painting factory-finished plywood
Treat the following as a planning sequence. Use the selected coating system’s instructions for the actual products and abrasive. General Finishes’ existing-finish guidance places cleaning before prep sanding; it also warns that polish, wax and silicone contamination can undermine adhesion. [5]
-
Record the panel and existing surface
Save the product, variant, batch information and before photos. Identify whether the piece is fresh stock or an installed cabinet with an unknown cleaning history.
-
Clean before abrading
Use a cleaner compatible with the existing finish and the new coating system. Try it on a small area first, follow its residue-removal instructions, and let the surface dry. Do not flood raw edges or joints.
-
Scuff only as the system requires
Where abrasion is specified, aim for the required uniform surface—not bare wood. Record the abrasive and method. Do not sand through thin veneer or a decorative melamine face trying to remove every trace of shine.
-
Remove dust and inspect again
Use the coating supplier’s approved method without adding polish, oil or wax. Treat exposed wood, filler and intact factory finish as separate areas that may need different preparation.
-
Coat a sample before the cabinet
Apply the chosen primer and paint at their specified coverage or film build. Record application times and conditions. Keep the test process close to the way you will finish the actual project.
Working safely: follow product labels and safety data sheets for ventilation, dust control and protective equipment. Do not mix cleaners. Older or unidentified paint layers may require a hazardous-coating assessment before sanding. [3]
Recoat time is not the same as test readiness
A primer may accept a topcoat well before it develops its final adhesion. For example, Rust-Oleum’s Bulls Eye 1-2-3 guidance allows topcoating after about one hour but states that full adhesion and hardness develop in seven days. That is a product-specific example, not a schedule for every primer or finished paint system. [4]
| Timing term | What it answers | What it does not prove |
|---|---|---|
| Touch dry | Can the surface be touched as described on the label? | That it is ready for tape testing, stacking or hardware installation. |
| Recoat window | When may the next coat be applied? | That the entire system has reached service cure. |
| Adhesion-check timing | When should this coating stack be evaluated on this substrate? | A universal number of days for every surface and paint. |
| Return to service | When may doors, shelves and surfaces receive their intended use? | That every primer/topcoat combination is interchangeable. |
Follow the recoat window during application, then allow the full system’s specified test or cure interval. Do not miss a recoat window simply to wait for a primer-only test; use a separate witness sample when needed.
Build a useful coating adhesion test
A useful comparison changes one planned variable and records the rest. Run UV-coated birch and white melamine as separate groups. For an installed cabinet, include a representative concealed area only with permission; fresh stock alone does not represent that cabinet’s surface history.
| Sample | Purpose | Control the comparison |
|---|---|---|
| Unpainted reference | Document the original surface and condition. | Keep a labeled offcut from the same material alongside the coated pieces. |
| System A | Trial the supplier-recommended prep, primer and topcoat. | Record every product and step, including film build and elapsed time. |
| System B, when needed | Compare an approved alternative. | If more than the primer changes, describe it as a system comparison—not proof that one primer alone caused the difference. |
| Primer-only witness | Help investigate which interface failed. | Record its different coating history. It cannot replace testing the complete paint system. |
Photograph the original face, prepared face and cured coating before any destructive check. Label every sample so a detached flake or tape strip can be traced back to the correct surface and coating sequence.
Use the tape-test method your supplier specifies
Ask the coating supplier to specify a suitable test for coated wood or laminate before starting. If a cut-and-tape check is chosen, its cutter, cut spacing, depth, tape, application and removal procedure all need to be defined. A random pull with painter’s tape is not a standardized test. [6]
-
Wait for the agreed test age
Record the elapsed time since each coat and the curing conditions. Do not compare one system after a day with another after a week and call that an equal trial.
-
Use a sacrificial test area
Support the sample. If scoring is part of the procedure, use the specified tool and geometry rather than gouging the veneer with improvised cuts. Photograph the scored area before applying tape.
-
Apply and remove tape consistently
Use the specified tape, contact method, dwell time, removal angle and speed. Record them. Do not substitute masking tape or change the procedure between samples without noting it.
-
Record what detached
Photograph the surface and removed tape. Note whether the topcoat, primer, original factory finish or wood fibers detached; those observations suggest different problems.
-
Repeat and assess service needs separately
Check a second sample or fresh area using the same method. Evaluate cleaning and expected wear on separate, undamaged coupons after the appropriate cure interval.
Keep the claim narrower than the test. ASTM D3359 was developed for coatings on metal and notes limitations for nonmetallic substrates. An informal plywood check is not ASTM certification, an absolute bond-strength measurement or proof of long-term cabinet durability. Report observations rather than inventing a “5B” rating. [7]
What the result may be telling you
| Observation | Possible concern | Next step |
|---|---|---|
| Paint lifts; primer remains | The topcoat-to-primer interface or its cure/recoat history. | Review compatibility and timing before adding more paint. |
| Primer and paint lift together | Bonding to the factory surface, contamination or insufficient cure. | Recheck preparation and system suitability on fresh samples. |
| Original finish or wood fibers detach | The underlying layer, substrate or damage from the test cut. | Inspect the failure layer; do not automatically blame or approve the primer. |
| A scratch marks the paint without peeling | Surface hardness or incomplete cure may be involved. | Do not treat a scratch alone as an adhesion rating. |
| No visible lifting in the chosen check | A limited favorable observation for that sample. | Retain the sample, review repeat results and assess the intended use. Do not promise permanent adhesion. |
Visible lifting is a reason to stop the full job and investigate. An inconclusive or damaged test needs repeating. Extra coats do not resolve an unverified bond underneath.
Original Berta panel results: pending
No completed panel-and-coating test record has been supplied for this draft. There is therefore no tested primer winner, no pass/fail result and no Berta-specific repainting guarantee to report.
Before publication, this section needs real sample identification, preparation and coating details, cure conditions, before-and-after photographs, repeat observations and a conclusion limited to the tested surface. A result on UV-coated birch must not be relabeled as a white melamine result.
Paint-first plywood or an existing factory finish?
For new painted parts, unfinished material avoids the extra factory-finish-to-primer interface. For panels already installed, use the prefinished product page to identify the original surface—not as evidence that a particular paint will adhere.
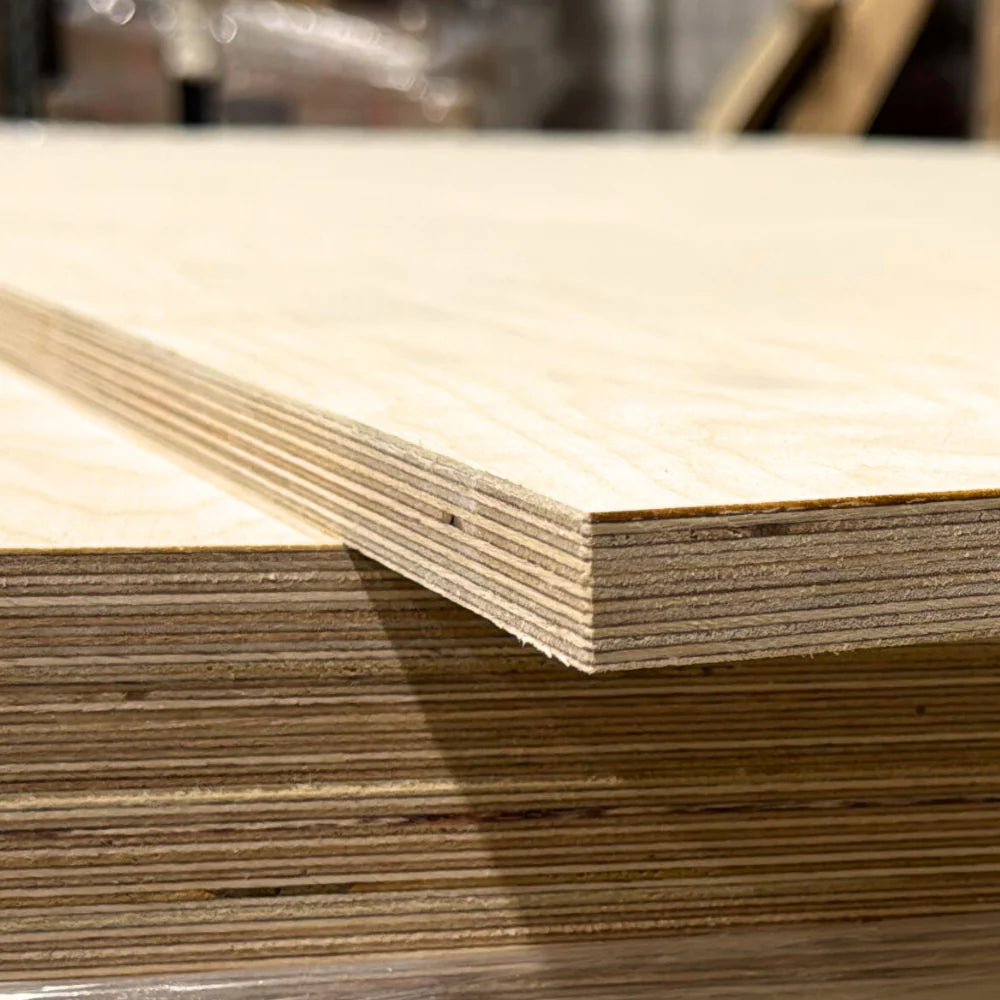
Unfinished B/BB Baltic Birch
One cleaner B-grade face and a BB back, unfinished and sanded on both sides. Prepare the raw veneer and edges for the chosen cabinet-paint system.
Thickness: 18 mm, sold as nominal 3/4 inch
Purpose here: A raw alternative, not a primer test result.

Prefinished Plywood: Birch or White Melamine
Review which surface and finished-side configuration you have. The image shows clear-finished birch; white melamine is a separate option on the page.
Surfaces: UV-coated birch or white melamine
Purpose here: Existing finish identification, not a repainting approval.
These are product photographs, not photographs of adhesion tests.
Frequently asked questions
Can you paint prefinished plywood without sanding?
Some primers permit application to certain glossy surfaces without sanding, but that does not verify every factory finish. Follow the selected system’s preparation instructions and test the actual surface. “No sanding” is not permission to skip cleaning or compatibility checks.
Do I have to strip the factory finish to bare wood?
Not automatically. First determine whether the existing finish is sound and whether a compatible overcoating system is available. Aggressive removal can damage the veneer or decorative face. Failed or unidentified surfaces need assessment before choosing removal or replacement.
Can I use the same procedure on white melamine?
Do not assume so. White melamine and UV-clear-coated birch are different surfaces. Obtain guidance and keep the test records separate for each material.
How long should I wait before an adhesion test?
Use the timing agreed for the exact primer, topcoat and conditions. A recoat interval is not the same as an adhesion-test or service-cure interval. Record time since each coat, not just time since work started.
Is a tape test enough to approve an entire kitchen?
No. It checks a small area under one procedure at one point in time. Repeated observations and appropriate service checks are still needed; an uncut tape pull or fingernail scratch does not establish long-term performance.
Should I buy prefinished plywood if I know it will be painted?
For a new paint-first build, unfinished plywood is the more direct starting point. It still needs suitable preparation and coating, but there is no factory finish to qualify beneath the new paint.
Bottom line
Painting prefinished plywood is a compatibility decision before it is a painting job. Identify the surface, select a documented coating system, prepare representative samples and evaluate the cured layers. Do not turn a promising sample into a claim about every sheet or finish.
For broader purchasing decisions, read Choosing Plywood Finish or the prefinished vs unfinished plywood comparison . This guide is reserved for the refinishing question: will the new coating system adhere to the existing surface?
Sources and testing scope
[1] Berta product specifications: Prefinished Plywood and unfinished B/BB Baltic Birch . Product descriptions identify the materials; they are not repainting-test reports.
[2] Existing coating failure: General Finishes: adhesion failure .
[3] Primer preparation and compatibility: INSL-X Stix SXA-110 technical data sheet . Read the current label and safety information for the formulation being used.
[4] Primer substrates and timing: Rust-Oleum: Bulls Eye 1-2-3 Water-Base Primer .
[5] Cleaning and preparation: General Finishes: preparing an existing finish . Its instructions illustrate a coating-system workflow, not a tested Berta recipe.
[6] Tape-test procedure variables: Elcometer adhesive tape guidance . Select the actual procedure with the coating supplier.
[7] Standards scope: ASTM D3359-23 public scope and limitations . The proposed shop workflow above is not a reproduction of the standard or a claim of compliance.


